Search Results
Results found for empty search
- Blooms in Season: August
Since everyone’s garden is bursting with blooms right now, we decided to center this post around making an arrangement from your garden – whatever you might have. Whether it’s sunflowers, dahlias, or even herbs like rosemary or thyme – you can use all of these to make a last minute arrangement for a causal dinner party or to spruce up your living room. Thank goodness Natalie’s here to help! What are your favorite flowers to grow? Anything that grows well! The thing is that changes from season to season. I love a challenge but I also love a pretty flower. Right now I am enjoying growing our lambs ear since it looks so good on its own in the garden or cut and in an arrangement. When choosing flowers for your garden – is there a science to having the perfect variety? When planting a small garden I like to make sure that all the flowers in the garden complement one another. A general color palate is nice and very pleasing. In this particular garden I made sure that everything I planted worked as a cut flower. I also planted a small herb garden, as I love to entertain and fresh herbs are always a great idea. Is there a trick to keeping garden flowers alive once they are in the arrangement? The best thing to do is to cut the flowers during the coolest part of the day and directly put them in water. Sometimes garden flowers last longer than store bought flowers since they do not need to travel as far to get to your home. Sometimes, they don’t last as long as they are not meant to be long lasting. The beauty of having a garden is that you can easily access flowers and play around with what you have. What is your tip for arranging from the garden? Don’t hesitate. Go for it! If you are lucky enough to have an outdoor space then plant something in it and enjoy the rewards. Don’t feel afraid to cut your flowers and bring them inside to enjoy. That is the best part of having a garden. When did you start gardening? I had my first garden when I was eight years old. My mother is an avid gardener and is a professional garden designer, so I was constantly surrounded by blooms growing up. My mother taught me that it is not always easy, and nature is stubborn, but there are few activities I find more rewarding than gardening. Thanks for inspiring us to use what’s in our garden, Natalie. Check back next month for another Blooms in Season post! Flowers by Natalie Bowen Designs //Photos byCaitlin Flemming #lifestyle
- On the Menu: Fig Cheesecake
Today marks our last recipe to complete our second Supper Club – dessert. If you are going to splurge or indulge on something, in my opinion, cheesecake is the perfect choice. Plus, I love the addition of fresh figs from the farmers market to make it extra special. Depending on the season you can add raspberries, blackberries, or figs. I hope you enjoy this dessert as much as we did – it’s divine! Fig Cheesecake Ingredients Crust: 2 cups of ground graham crackers ½ teaspoon cinnamon 1 stick of melted unsalted butter Filling: 1 pound cream cheese (2x 8 ounce blocks, softened) 3 eggs 1 cup sugar 1 pint sour cream Zest of one lemon 1 teaspoon vanilla Directions 1. Preheat oven to 325. 2. To make the crust- in a mixing bowl combine all of the ingredients with a fork until it is evenly mixed. Lightly coat the bottom of an 8 inch spring form pan with non- stick cooking spray. 3. Pour the crumb mixture into the pan and use the bottom of a glass to press the crumbs down into the pan. Set in the refrigerator for 5 minutes. 4. To make the filling- In the bowl of mixer, beat the cream cheese on low for 1 minute until smooth. Add the eggs one at a time and slowly add in the sugar. Beat for 2 minutes. Add the lemon zest, sour cream and vanilla. Pour this mixture into the crust lined pan and smooth the top. 5. Set the cheesecake pan on a large piece of aluminum foil and fold the sides around. Place the cake in large roasting pan. Pour boiling water into the roasting pan until the water is around halfway up the sides of the pan. The foil will keep the water from seeping into the cheesecake. Bake for 45 minutes. Let cool for 30 minutes and then refrigerate for at least 4 hours. Unmold and transfer to a cake plate. Spread the fresh figs on top. Recipe by Grant Gibson | Photography by Caitlin Flemming #cooking
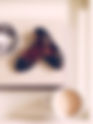
- Giveaway: Freda Salvador Shoes
As many of you know – I’m a huge fan of Freda Salvador shoes. Actually mildly obsessed . . . they are comfy, stylish and every single time I wear a pair I’m bound to get asked where they are from. Their fall collection is one of my favorite collections yet – the mix of leathers, colors is fabulous and they added a heeled boot that is stunning. Hear more about what inspired them this season. What was the inspiration for your fall collection? We love designing Fall. For this collection we were inspired by 70’s and 90’s music…Rock and Roll and Grunge! Janis Joplin in the 70’s and Kate Moss in the 90’s. The lines are geometric and simple, but we played around with hardware, like studded welts and removable studded harnesses. We added an elongated toe flat and 2.5′ heeled bootie to our assortment this season…which definitely plays up the Rock/Grunge feel! How do you choose your fabrics? Does that have any effect on how next season’s line will look? Twice a year we go to a leather and component Fair in Bologna Italy where we choose all of our leathers. We of course have our favorite tanneries that we see first and then we love just browsing the entire Fair. It is unbelievable what they can do with leather! For Fall we love using hair calf, so depending on what prints are being offered, that definitely inspires our designs. What exciting things are coming for Freda Salvador in the future? We have several surprises up our sleeve, especially for our San Francisco customers, so stay tuned!!!! Now the fun begins – we’re giving away one of our favorites and a staple in my closet, the Freda Salvador Change shoes. You can wear them with just about anything – jeans and a tee, shorts for our Indian summer that should be arriving, or pair them with a skinny black pants to dress them up. Then you have to decide if you want to wear them with the saddle or without. The sky is the limit with these beauties. It’s one of the favorites of the Freda founders and myself! Here’s how they would style these giveaway shoes. What is your favorite way to style the giveaway shoes? This is one of our favorite shoes of the collection because of the print and versatility. We love this print specifically because it is interesting but still a neutral. We like to wear it casually on the weekends with the saddle on and rolled up jeans. Take the saddle off for a simple loafer…perfect with more tailored, skinny jeans for work. To enter, simply tell us how you would style these Freda Salvador Dotted Change shoes for fall. Then pop over to Freda Salvador to follow them on twitter or instagram. If you live in SF – be sure to stop by their beautiful store on Union Street! We can’t wait to hear how you’d wear these loafers! Entries must be posted by Monday, August 26th, at 10 a.m. PST, and one winner will be chosen at random. *Please do not leave your email or web address in the body of the comment, only in the allotted boxes. Winner will be contacted by email once comments close, and announced at the bottom of this post soon after. Photography for Sacramento Street courtesy of Freda Salvador #style
- a brand new week . . .
After a weekend enjoying time in Reno and Tahoe with good friends, it’s time get this Monday morning off to a productive start. There is a lot in store this week! I’m excited to share lots of beautiful features here this week – check back later today for a fabulous giveaway that you won’t want to miss, the last recipe from Supper Club (dessert!), Natalie Bowen will be sharing a new flower arrangement, and more! School is starting this week in San Francisco so it feels like a fresh start in this neck of the woods. I hope all of you have a wonderful week. Photo by Caitlin Flemming (iPhone) #lifestyle
- Recent Work: Project Bly Look Book
Last January I started working with Project Bly styling their look books. I’m excited to share one that finally launched last week. Both Jessica and I had a blast working together on this first look book – the items from Kumasi have such a rich history behind them, which made it even more special. Be sure to pop over to check out the entire Kumasi collection – there’s stunning jewelry, handmade masks, brass animals, textiles that will have you wanting pops of color in your home and more! Images: Jessica Comingore / Styling: Caitlin Flemming #interiors
- On the Menu: Risotto with Chard and Wild Mushrooms
It’s Grant again sharing one of my favorite recipes to serve at dinner parties. I used to be afraid of making risotto, thinking that it was really complicated. It is actually really simple to make. Rice, broth and touch of butter come together to create a hearty dish that’s satisfying and delicious. Once you have the basic recipe down, you will start dreaming up new combinations to try. I love checking out what is fresh at the farmers markets and coming up with my combos that way. For this we chose chard and fresh wild mushrooms. I cooked these down first and then put them on side and incorporated them into the risotto when it was all cooked. Risotto with Chard and Wild Mushrooms Ingredients 6 cups of broth (you can use chicken or veggie- I prefer to the low-sodium versions) ½ stick of unsalted butter 1 large shallot, diced small Salt and pepper 1 cup of Arborio rice ½ cup of dry white wine 2 tablespoons grated Parmesan Directions 1. In a medium saucepan, bring broth to a simmer: reduce heat and keep warm. In a heavy- bottomed skillet or pot (like a Le Creuset), heat ½ of the butter over medium heat. Add in the shallot, season with some salt and pepper. Cook for around 3-4 minutes (until the shallot is soft). Add in the rice and keep stirring, coating each grain for about a minute. 2. Add in wine to de-glaze the bottom of the pot for around 2 minutes. The starch from the rice starts to stick to the bottom a bit- this is where the wine magically lifts it up and stops it from sticking. Ladle in about 1 cup of broth, stirring continually until the broth is absorbed (around 4 minutes). Repeat this step until all of the liquid is slowly added in- around 20 minutes. 3. Remove from heat and stir in the rest of the butter and Parmesan. This is when you can add in the veggies. Season with salt and pepper. Add more cheese on top! Recipe by Grant Gibson | Photography by Caitlin Flemming #entertaining #cooking
- a brand new week . . .
After a foggy Saturday and enjoying some cozy time at home, I decided that a spontaneous trip to Sonoma was in order on Sunday. A trip to the Petaluma antique shops and then lunch at Girl and the Fig was the perfect way to cap off the weekend. What has been inspiring me this week are the new additions to my bulletin board – two new watercolors from Rebecca Atwood (she’s a new sponsor), a print from the lovely Joanna Williams and fabrics for a client (one being from Serena & Lily who is having a major sale!). Has something been inspiring you lately? This week there are a lot of amazing posts in store that will inspire you! A delicious new recipe from our Supper Club, I’ll be sharing images from a lookbook that just launched that I helped style, a new workspace feature that I can’t wait to share and much more. So be sure to check back regularly! I hope each and every one of you have a productive week ahead. Photos Caitlin Flemming #lifestyle
- On the Menu: Peach Gazpacho
Grant here, and I’m excited to share another Supper Club recipe! I had this at one of my favorite San Francisco restaurant – Piccino a few weeks ago and knew that I had to recreate it for Supper Club. I love gazpacho because it is so refreshing and healthy. Adding in peaches- fresh from the farmers market seemed like a perfect summer soup to start the meal. Peach Gazpacho (Serves 10) Ingredients 4 slices of white bread (I used gluten free Udi bread) ½ cup of water 1 red bell pepper, seeded 2 lbs of tomatoes 2 ripe peaches 2 cloves of garlic 3 Tablespoons of red wine vinegar ¼ cup of olive oil Green Tabasco – 5 dashes- add more if you like it spicy Salt and pepper Garnish: diced cucumber and cilantro Directions: 1. In the bowl of a food processor, soak the bread in the water until soft. 2. Add in the pepper, tomatoes, peaches, garlic and vinegar. Blend until smooth. 3. With the motor running, add in the olive oil and seasonings. 4. Add more Tabasco if you want more of a kick. 5. Garnish with diced cucumber and cilantro. And enjoy! Recipe by Grant Gibson | Photography by Caitlin Flemming #entertaining #cooking
- a brand new week . . .
A huge thank you goes out to everyone that came to our successful Alameda Flea Market sale. Your support means the world! It was such fun meeting readers and seeing old friends. I decided to keep it pretty low key today because Sundays 3am wake up call hit me hard last night and this morning. I have to say, sunflowers have been inspiring me, they are smiling bright at the grocery store and flower market. I’ve been filling my apartment with them. They make me smile every time I walk in my living room. Do they have that affect on you? This week I’ll be sharing another delicious recipe from Grant, a new room anatomy post that will have you smitten and much more. So be sure to check back! Have a wonderful first week of August everyone. Photo by Caitlin Flemming #lifestyle
- Rebranding: Business Cards
Since launching Caitlin Flemming Design, I’ve been brainstorming how to create a business card that embodies both businesses. When brainstorming design ideas there were a few key design aspects I wanted to achieve – it needed to be minimal, a grey font, and I wanted my signature to add a personal touch. That’s when I turned to the ever so talented Hanna of Gadabout. After a couple design phone calls she created a beautiful letterpress business card that I’m absolutely in love with. It makes me incredibly excited to pass these newbies out and as I sit here looking at them sitting on my desk, I’m giddy about the way they turned out. They’re perfection! Business Cards by Gadabout | Photos by Caitlin Flemming #interiors